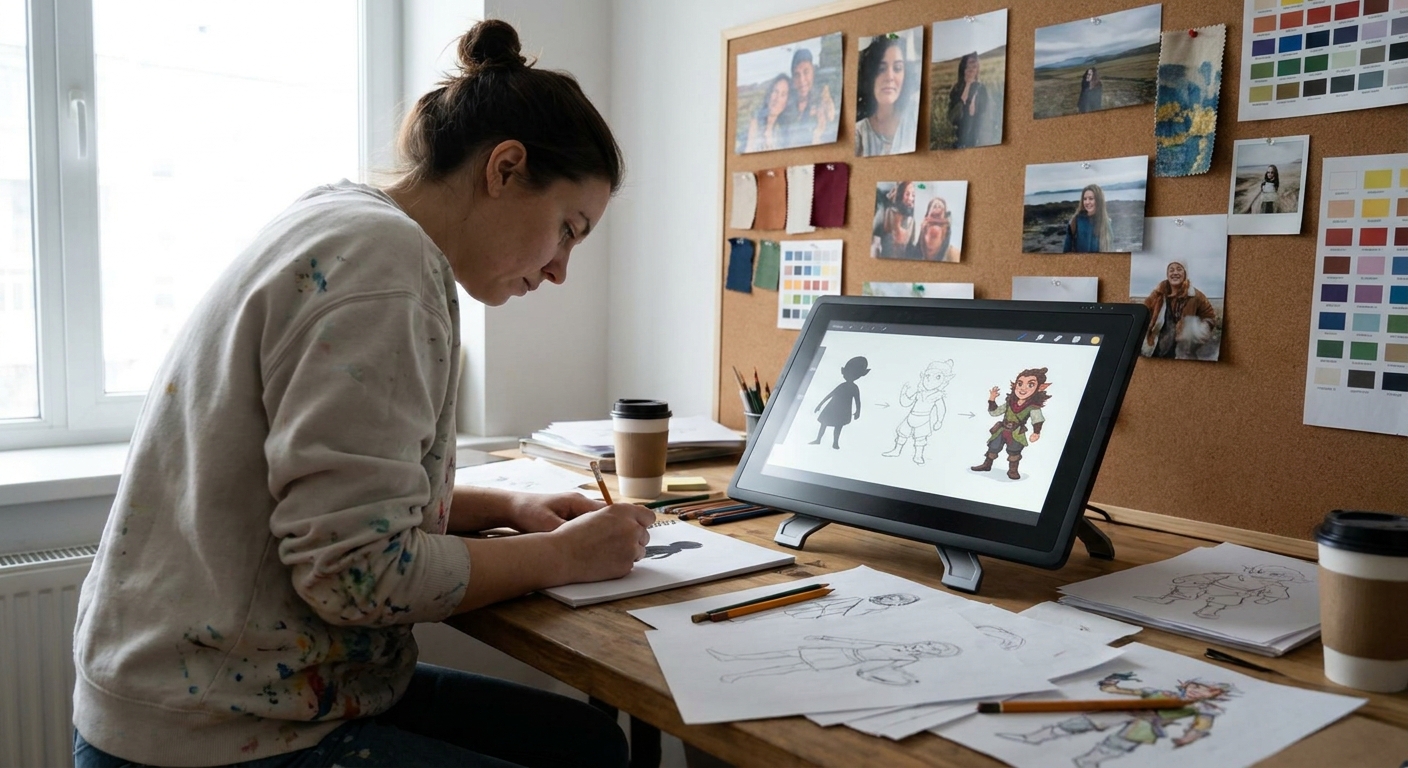
Great character design rarely happens in one perfect drawing. Professionals work in passes: rough, refine, redesign, and polish. This guide walks you through building a full character concept sheet from a messy idea, using iterative steps you can repeat for any project.
From Scribble to Showcase: The Power of Iteration
You’ll learn how to:
- Brain-dump rough ideas fast
- Use variation passes to explore options
- Organize layers for painless revisions
- Add color keys, turnarounds, and detail callouts
Follow along with your preferred software—Procreate, Photoshop, Clip Studio, Krita, or similar.
Step 1: Idea Dump Without Judgment
Before cleaning anything, generate quantity over quality.
Canvas & Brush Setup
- Canvas: 4000 x 3000 px, landscape
- Brush: rough pencil
- Opacity: 40–60%
- Flow: 70–100%
- Size: small-medium
Exercise: 10-Minute Idea Storm
- Divide the canvas into a 4x3 grid (12 boxes).
- In each box, sketch a different version of your character idea.
- Vary age, body type, costume, silhouette.
- Don’t erase; just draw on top.
- Spend under 1 minute per sketch.
You’re not looking for The One yet, just possibilities.
Visual Thinking Prompt
Ask quick questions as you go:
- What if they were older/younger?
- What if they came from a different climate?
- What if their job changed?
Circle 2–3 sketches that feel the most promising.
Step 2: Focused Variation Pass
Now we deepen those promising starts via targeted exploration.
New Layer Strategy
For each chosen sketch:
- Lower the original sketch layer opacity to ~20–30%.
- Create a new layer on top.
- Redraw with more clarity, keeping the energy.
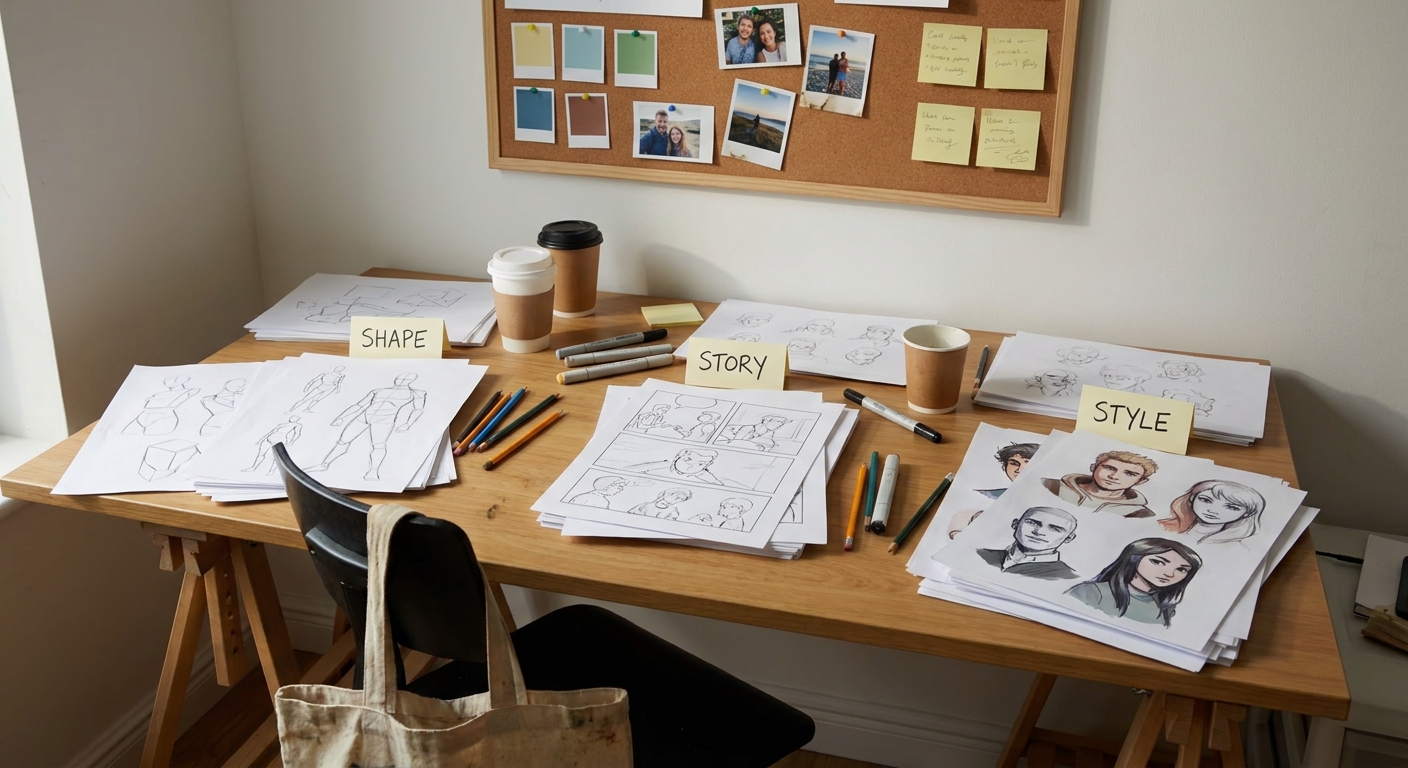
Variation Grid
Create three vertical columns for each character candidate labeled:
- Shape
- Costume
- Personality
Column 1: Shape Variants
Keep costume & personality similar; alter proportions.
- Taller/thinner
- Shorter/stockier
- Bigger head, smaller body
- Different torso-to-leg ratios
Column 2: Costume Variants
Keep basic shape the same; vary clothing.
- Light armor vs heavy armor vs no armor
- Cape vs no cape
- Urban wear vs fantasy wear
Column 3: Personality Variants
Change posture and expression.
- Confident vs withdrawn vs cocky
- Relaxed vs battle-ready vs exhausted
You’ll end up with a mini wall of options.
Step 3: Picking and Combining the Best Ideas
Time to curate.
Selection Criteria
When choosing your main direction, look for:
- Clear silhouette
- Strong personality (even without color)
- Interesting shapes (not generic)
- Fit to brief (if you have one)
Mix-and-Match
Your final design can combine:
- Shape from Sketch A
- Costume from Sketch D
- Hairstyle from Sketch F
- Expression from Sketch C
On a new layer, draw a combined version that merges your favorite elements.
Give this one a bit more care—cleaner lines, clearer forms—but still keep it in the sketch phase.
Step 4: Clean Construction and Turnaround Planning
Before you build a full sheet, stabilize the design structurally.
Construction Pass
- Create a new canvas (3000 x 3000 px) for the main character.
- Paste or redraw your chosen sketch.
On a new layer, draw simple construction lines:
- Center line on torso and head - Eye line & nose line - Planes of the face - Cylinder indications for limbs
Tidy proportions now; future work will be easier.
Basic Turnaround Planning
Decide which views you need:
- Front and 3/4 are musts.
- Add side and back if needed (games, animation, etc.).
Lightly block in these additional views using the same head height and basic proportions.
Step 5: Clean Line Art and Layer Organization
Line art can live on its own layer stack, ready for recolors and tweaks.
Layer Stack Template
- Group: 01_Sketch (hide once finished)
- Group: 02_Line
- Line_Front
- Line_3Q
- Line_Side
- Line_Back (optional)
- Group: 03_Color
- Flats
- Shadows
- Highlights
- FX
- Group: 04_Notes & Callouts
- Hard round / inker
- Size: 3–6 px
- Opacity: 100%
- Pen pressure: controls size
- Stabilization: 10–25%
- Consistent style across views
- Clear overlaps (belts over tunics, hair over armor)
- Slight line weight variation for depth
Line Art Brush Settings
Reduce sketch opacity to 20–30% and ink carefully, focusing on:
Step 6: Flat Colors and Palette Exploration
Flats help define the character clearly and make color variations easy.
Flats Workflow
- Place your line layers on top, set to Multiply.
- Below them, create a BaseColor layer.
- Fill the full character shape with a mid-gray or mid-tone.
- Lock Alpha Lock (Procreate) or Lock Transparent Pixels.
- Paint local colors (skin, hair, clothing) directly on this base.
Use lasso selection and fill tools for fast, clean edges.
Color Variation Technique
- Group your color layers.
- Duplicate the group 3–4 times.
On each group, try a different palette:
- Warm vs cool - High saturation vs muted - Darker vs lighter overall value
Use adjustment layers:
- Hue/Saturation
- Color Balance
- Gradient Map (especially in Photoshop/Clip Studio)
Pick 2–3 favorite color schemes to include on your final sheet.
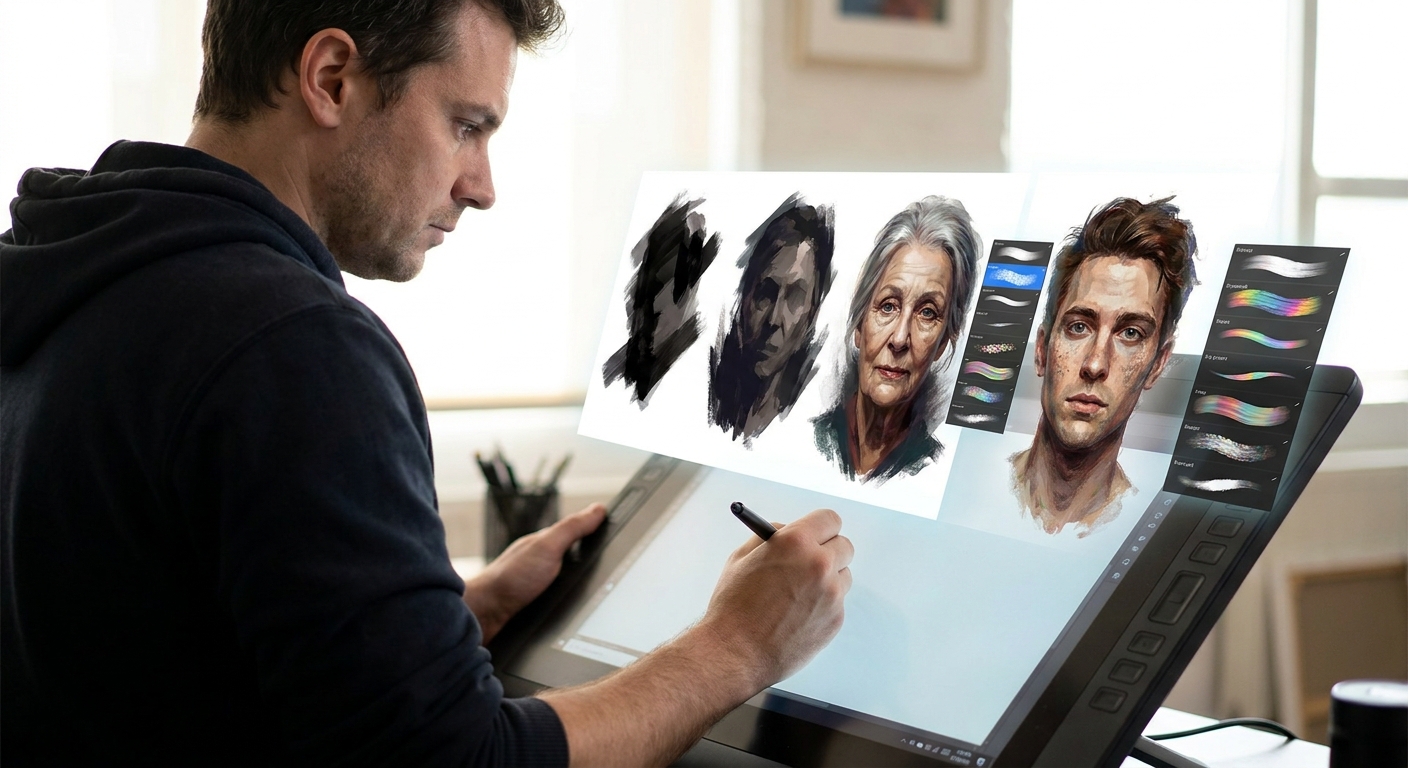
Step 7: Shadows, Highlights, and Material Notes
We’ll keep rendering simple but informative.
Basic Lighting Setup
- Choose one light direction (e.g., top-left).
- Create a Shadow layer as a clipping mask above flats.
- Set blending mode to Multiply.
- Use a soft brush, 20–40% opacity.
- Chins and noses
- Overhangs of hair and armor
- Inside folds of fabric
- Shiny armor edges
- Glossy boots
- Metal and glass details
Paint shadows under:
Add a Highlight layer (Overlay/Add) for:
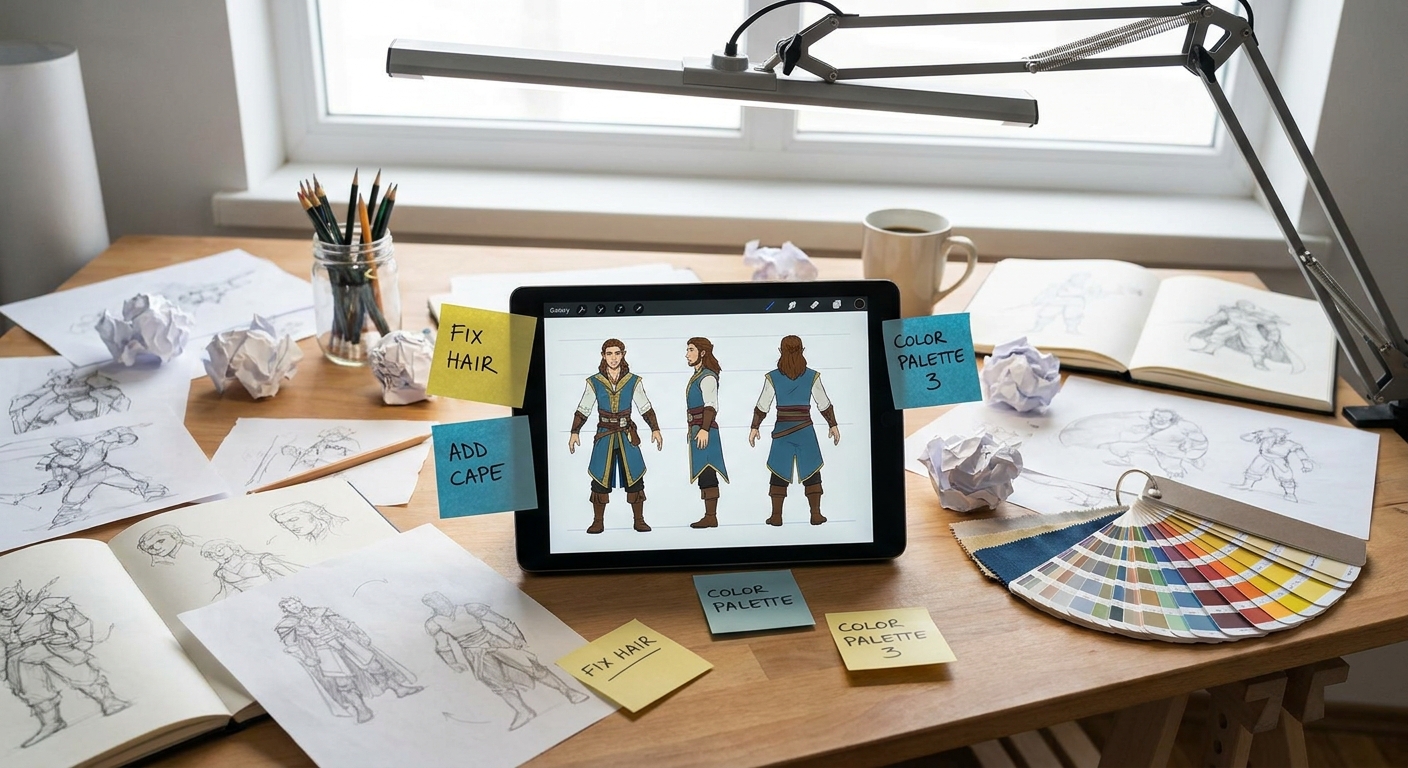
Material Callouts
On the Notes & Callouts layer group, use a small, clear brush to add:
- “Wool cloak – heavy, matte”
- “Polished steel – bright edges”
- “Leather straps – cracked, worn”
Arrows and tiny thumbnails help clarify how parts move or attach.
Step 8: Building the Concept Sheet Layout
Now we lay everything out for easy reading.
Recommended Layout (A4 or 4K Canvas)
- Top left: Character name + one-line description.
- Center: Large full-body 3/4 view.
- Side: Front, side, and back views smaller.
- Corners: Head close-ups (neutral and expressive).
- Bottom: Color variants and key props.
- Margin: Material and design notes.
Group and resize elements using your Move/Transform tools until the page feels balanced.
Design Tips
- Leave negative space so the sheet isn’t cramped.
- Use a limited accent color (like a brand color) for titles and notes.
- Keep background value around mid-gray or light neutral.
Step 9: Quick Expression and Hand Studies
Characters come to life in their faces and hands.
Expression Strip
- Create a row of 4–6 small head boxes.
- Re-use your base head proportions.
Draw different expressions:
- Neutral - Happy - Angry - Worried - Smug
Keep these on a separate layer group: 05_Expressions.
Hand Minis
Do 3–4 small hand sketches matching personality:
- Relaxed
- Fist
- Gesture specific to them (salute, magical sign, etc.)
Place these near the bottom or side with short notes.
Step 10: Versioning and Feedback
A polished concept sheet is also easier to share for critique.
Version Control Tips
- Save versions like:
CharName_Sheet_v01,v02, etc. - Before big changes, duplicate the file.
- Keep earlier versions for reference; sometimes you’ll bring back an old idea.
Feedback Checklist
When reviewing your sheet (or asking others):
- Is the silhouette clear?
- Does the character read consistently across views?
- Are important details and materials explained?
- Do expressions match the written personality?
Use the feedback not as a verdict, but as a prompt for the next iteration.
Software-Specific Shortcuts for Iteration
Procreate
- Use QuickMenu shortcuts for Duplicate and Flip.
- Take frequent Time-lapse exports to review your process.
- Use Layer Comps to store multiple color variants.
- Group layers and color-code them (Sketch = blue, Line = green, Color = yellow).
- Use Auto Actions to duplicate and label new iteration groups.
- Turn on Change Layer Color for sketch phases.
- Use Layer Styles for quick outer glows/rim lights.
- Save Workspaces: one for sketching, one for sheet assembly.
Photoshop
Clip Studio Paint
Krita
Turning Iteration Into a Habit
Try this weekly routine:
- Day 1: Idea storm page (12 tiny sketches).
- Day 2: Variation grid for 1–2 favorites.
- Day 3: Choose and combine, start structure.
- Day 4: Line art and flats.
- Day 5: Color variants and materials.
- Day 6: Expressions, hands, props.
- Day 7: Compile into a sheet and review.
Each week, your sheets will get more confident, your iterations faster, and your characters more intentional.
Iteration isn’t extra work; it’s the path that turns rough scribbles into professional, portfolio-ready character designs.