Light is the invisible director of your painting. It decides what feels important, what feels real, and what feels emotional.
Why Study Light in Digital Painting?
The advantage of digital painting? You get a zero‑risk lighting lab. You can flip lights, change colors, and rebuild shadows without tearing up a canvas.
This article is a hands‑on set of lighting exercises for all skill levels, using any painting software. Think of it as a series of studio drills you can repeat anytime to strengthen your understanding of light and shadow.
1. Start with the Simplest Subject: A Sphere
Forget dragons for a moment. We’ll start with the most basic 3D form: a sphere.
Step 1: Set Up the Canvas
- Create a new canvas (1500–2000 px square, 300 dpi).
- Fill the background with a mid‑value gray.
- Create a new layer and draw a circle in the center.
- Fill the circle with a mid‑value neutral color.
Name your layers:
BGSPHERE BASE
Step 2: One Light Direction
- Add a new layer above
SPHERE BASEcalledLIGHT & SHADOW. - Clip it to the sphere.
- Pick a simple light direction (e.g., top left).
With a soft brush (opacity 30–50%, flow 40–60%):
- Darken the area opposite the light (core shadow). - Lightly brighten the area facing the light.
Use a separate tiny doodle in a corner: draw a small circle and an arrow showing the light direction. This keeps your mental model stable.
Step 3: Add Cast Shadow
- Create a new layer below the sphere.
- With a soft brush, paint a shadow shape on the ground opposite the light.
- Make it darkest near the sphere and softer as it stretches away.
Repeat this whole exercise with:
- Top light
- Side light
- Back light (rim)
Put 3–4 spheres on one canvas. Label each light direction.
2. Visual Framework: The Five Parts of Light
As you work, learn to name what you’re painting. On a sphere under a single light, you’ll find:
Highlight – the brightest spot where light reflects directly
Light Side – the area facing the light
Terminator – the transition edge between light and shadow
Core Shadow – darkest area on the form (not the cast shadow)
Reflected Light – light bouncing back into the shadow from surfaces
Next time you shade anything digitally, ask yourself: “Can I find all five?”
Use labels or colored arrows on a separate layer to mark them on your sphere study.
3. Hard vs Soft Light Experiment
Now, let’s play with light quality.
Setup
Duplicate your best sphere file twice so you have:
SOFT LIGHTversionHARD LIGHTversion
Soft Light Recipe
- Use a large, soft brush.
- Keep transitions gradual.
- Shadows are diffuse and edges are soft.
This feels like an overcast day or a big, diffused studio light.
Hard Light Recipe
- Use a smaller, harder brush.
- Sharpen the edge between light and shadow.
- Keep clear, defined shadow shapes.
This feels like sunlight or a spotlight.
Compare the two versions. Notice:
- Where the edges are sharp vs blurry
- How dramatic the contrast feels
Now you have a mental slider: soft ←→ hard light. Use it intentionally in your paintings.
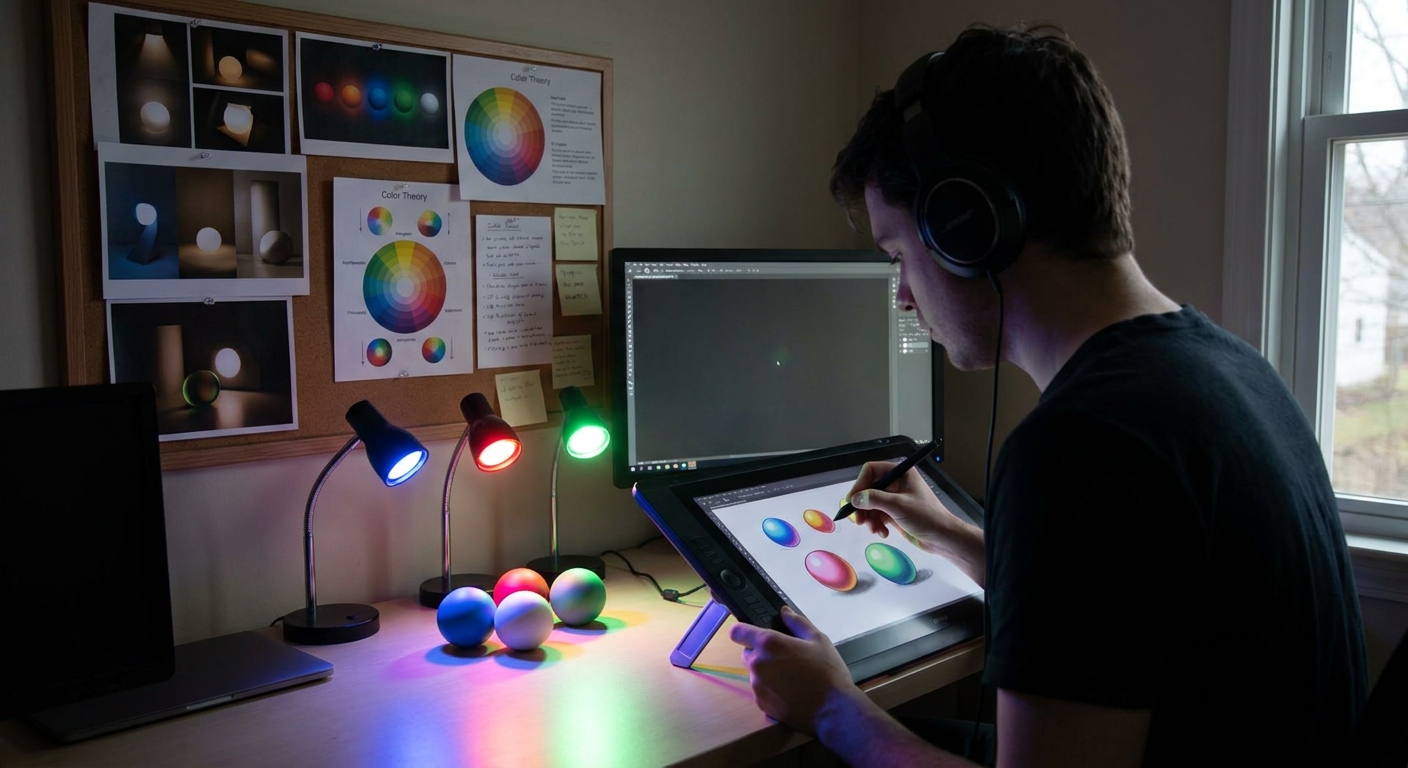
4. Color and Temperature: Warm Lights, Cool Shadows
Once you understand grayscale light, add color.
Exercise: Colored Light on a Sphere
- Start from a grayscale sphere.
- Add a new layer on top, set to Color or Overlay.
- Pick a warm hue for the light (soft orange or yellow).
- Gently paint over the light side and highlight.
- Choose a cooler hue (blue/teal) for the shadows.
- Paint over shaded areas.
The form should still read 3D, but feel richer and more atmospheric.
Try the reverse experiment: cool light, warm shadows. Notice which mood you prefer.
5. Applying Light to Simple Objects
Let’s step beyond spheres.
Make a new canvas with three simple objects:
- A cube
- A cylinder
- A sphere
Step‑By‑Step
- Draw flat silhouettes for each on their own layers.
- Fill each with a mid‑value color.
- Add a new clipped
LIGHT & SHADOWlayer for each. - Choose a single light direction (e.g., top right) and stick to it.
Think in Planes (Especially for the Cube)
For the cube:
- Top plane: lightest
- Side plane facing away: darkest
- Front plane: midtone
For the cylinder:
- Light wraps gradually around the curved surface.
- The terminator will be a smooth arc.
Repeat with two different light directions. You’re training your brain to rotate objects in light.
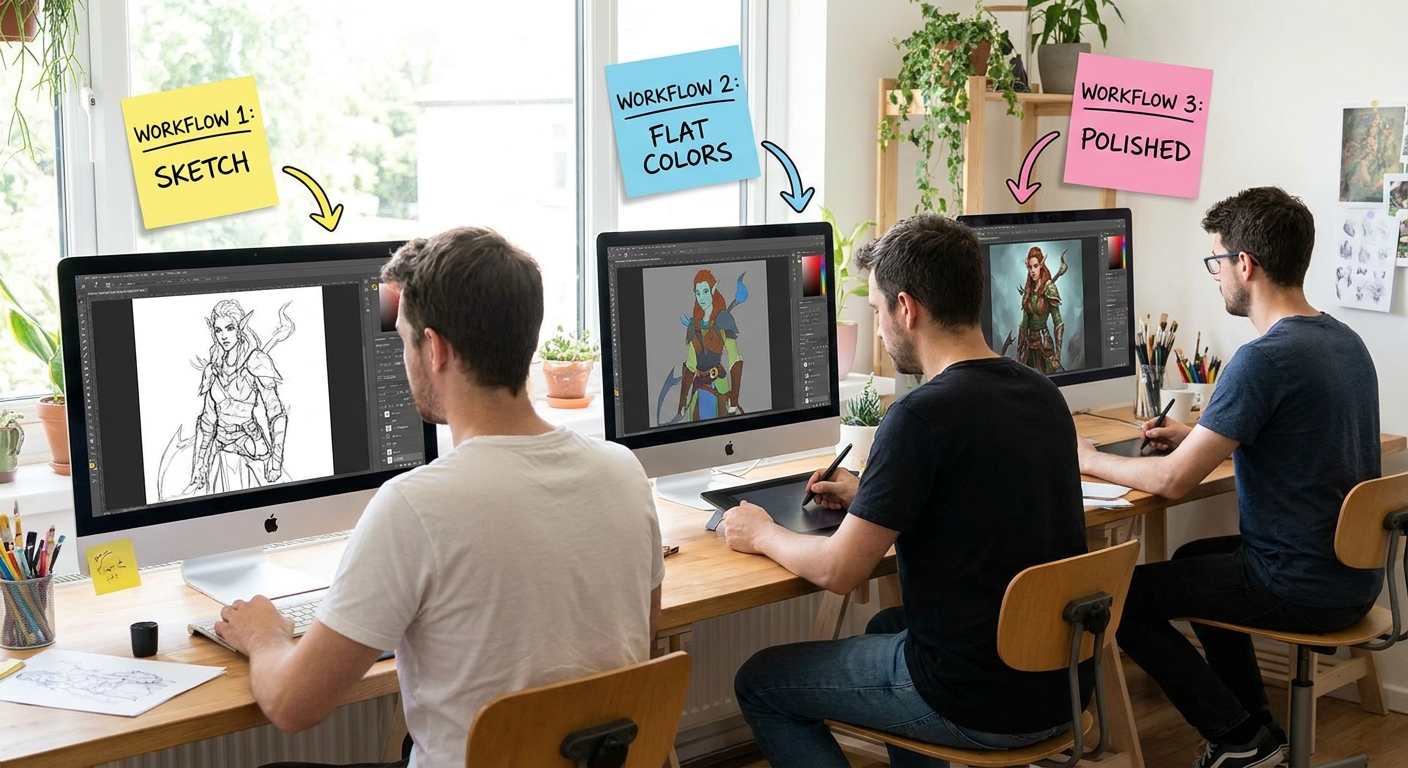
6. Lighting a Simple Character Bust
Now the fun part: apply your lab work to a character.
Setup
- Sketch a simple head and shoulders on one layer.
- Flat‑fill base colors on a layer underneath.
- Add a
LIGHT & SHADOWlayer clipped to your flats.
Step‑By‑Step Lighting Pass
- Decide light direction distinctly (front, ¾, side, rim, top‑down, under‑lighting).
Paint broad shadow shapes first:
- Eye sockets - Under the nose - Under the lower lip - Under the chin and neck 3. Introduce a secondary light if you like (e.g., cool blue rim from the opposite side).
Use your sphere and cube studies as reference: the head is just a complex combination of simpler forms.
Pro Tip: Keep a Value Check Layer
Add a layer on top filled with pure black, set its blend mode to Color. Toggle this on/off to quickly check your values in grayscale while you paint.
7. Lighting Scenarios to Practice
Create a dedicated LIGHTING STUDIES folder in your painting software. For each new canvas, pick one scenario:
Noir Side Light
- Hard, high‑contrast side lighting - Most of the face in shadow
Overcast Diffuse Light
- Very soft shadows - Narrow value range
Sunset Rim Light
- Warm back light - Cooler ambient light on shadow side
Under‑Lighting (Campfire / Horror)
- Light coming from below - Strange, dramatic shadow shapes
Screen Light + Ambient
- Blue light from a screen in a dark room - Slight warm bounce from the environment
Limit each study to 20–40 minutes. The point is repetition, not perfection.
8. Using Layers to Explore Light Non‑Destructively
One of digital painting’s superpowers is the ability to test lighting quickly.
Layer Stack Template
Line/SketchBase ColorsShadow Multiply(clipped)Light Overlay/Screen(clipped)Rim Light Add/Linear Dodge(clipped)Color Grading(Gradient Map or Color Balance)
Experiment: Light Swap
- Duplicate your entire file.
- On the new version, turn off your shadow & light layers.
- Create new shadow/light layers and choose a totally different light direction.
Compare them side by side. You’ll see how much story can change with just lighting.
9. Visual Thinking: Light as Story
As you get comfortable technically, start making creative decisions:
Ask these questions before painting:
- What emotion should the light convey? (calm, ominous, hopeful, mysterious)
- Where should the viewer look first?
- How much of the subject do I want to reveal vs hide?
Use these answers to pick:
- Light direction (front light reveals, back light conceals)
- Hard vs soft light
- High vs low contrast
- Warm vs cool palette
Now light isn’t just realism—it’s narrative.
10. Weekly Lighting Practice Plan
Here’s a simple plan you can repeat every week:
Day 1 – Spheres & Objects (30–45 min)
- 3 spheres with different light directions
- 1 cube + 1 cylinder study
- 1 grayscale bust with a chosen scenario
- Re‑light one previous grayscale study with full color
- Paint over or side‑by‑side study of a photo focusing only on light & shadow shapes
- Apply a learned lighting scenario to an original character or environment
Day 2 – Grayscale Character Lighting (45–60 min)
Day 3 – Color Lighting (45–60 min)
Day 4 – Photo Study (30–45 min)
Day 5 – Personal Piece (60+ min)
Repeat and adjust intensity based on your schedule.
Conclusion
You don’t have to guess at lighting. With simple objects, clear exercises, and smart layer use, you can treat your painting app like a controllable light lab.
Open a new canvas and paint just one sphere today. Mark the five parts of light. Then do it again tomorrow from a new angle. Over time, your characters, environments, and illustrations will feel more solid, dramatic, and intentional—because you’ll be in control of the light.